Industrial devices in python
U-Phy is a software library that brings industrial Ethernet protocols—such as PROFINET, EtherNet/IP, Modbus TCP, and more—into the hands of Python developers. It lets you develop industrial devices right from your PC, with no dedicated hardware required. Perfect for quick prototyping or full implementation of industrial communication.
In this quick guide, you’ll learn how to install U-Phy and run a ready-made Modbus device in just a few minutes. Setting up the other Ethernet protocols is just as straightforward and fully covered in the complete documentation. U-Phy runs with full functionality for one hour in evaluation mode. For commercial versions of U-Phy, contact sales.
Prerequisites
- A Windows or Ubuntu PC
- Python 3.10 or newer (available from python.org)
Installation
Install the U-Phy python packages.
We recommend using a Python virtual environment. The following instructions outline the steps to install the packages within a virtual environment.
Open a Windows Command Prompt:
- Press Win+R to open the Run dialog.
- Type cmd and press Enter to open Command Prompt
Execute the following commands:
					mkdir %USERPROFILE%\uphy-workspace
cd %USERPROFILE%\uphy-workspace

python -m venv .venv
.venv\Scripts\activate
pip install uphy
Execute the following commands:
					mkdir ~/uphy-workspace
cd ~/uphy-workspace

python -m venv .venv
source .venv/bin/activate
pip install uphy
The U-Phy server needs access to raw sockets to function properly. It also needs to configure network interfaces and to bind to ports lower than 1024. Run the following command to give the server binary these capabilities:
					sudo setcap cap_net_raw,cap_net_admin,cap_net_bind_service+ep \
  $(uphy-device server --print-path)
Test that installation was successful by running a simple command:
uphy --version
You should see:
					uphy version: 1.0.1
uphy-device version: 1.0.1
uphy-controller version: 1.0.1
Running a simple Modbus device
As a first step we will run a simple pre-defined Modbus device. Later on we will create our own device and show you how to run other protocols, but we will start with Modbus because it is the easiest way to test our device without installing a PLC or other network controller.
Start the pre-defined Modbus device by running:
uphy device mono modbus
As we haven’t specified which interface we want to run the Modbus device on, U-Phy will list all available interfaces. Example output:
					[0] Ethernet (08-00-27-47-B4-2E, 10.0.2.15, fe80::7883:116e:b86f:49b3)
[1] Loopback Pseudo-Interface 1 (127.0.0.1, ::1)
					[0] lo (127.0.0.1, ::1, 00:00:00:00:00:00)
[1] wlp2s0 (192.168.12.64, fe80::7c0:dbd6:7f79:fd8d%wlp2s0, 00:bb:60:b2:24:1f)
[2] enxe4b97ac3989a (192.168.11.33, fe80::e6b9:7aff:fec3:989a%enxe4b97ac3989a, e4:b9:7a:c3:98:9a)
[3] enp0s31f6 (e4:b9:7a:41:6f:21)
[4] enxc0a0bb58b71a (c0:a0:bb:58:b7:1a)
Select the interface you wish to use by entering the corresponding number, and you should see a graphical window:
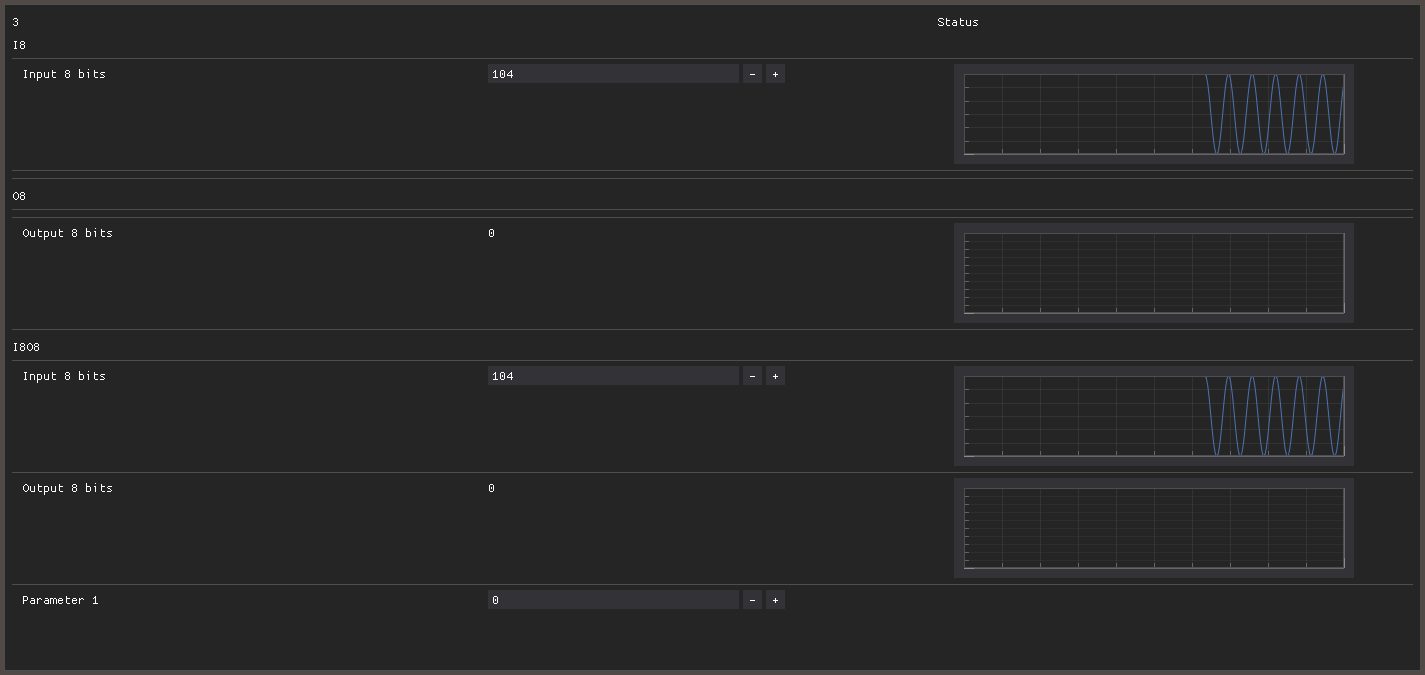
The window shows the current state of our device signals. The device consists of three modules:
- I8: Contains one input signal
- O8: Contains one output signal
- IO8: Contains one input and one output signal
All signals are 8-bit values. The IO8 module also contains one configurable parameter.
Remember that input signals are usually connected to a physical sensor, such as an analog capture pin. Likewise, output signals are usually connected to a physical actuator, for example a digital output. Parameters are often used to configure the device and could for instance be used to set the sampling rate of an analog input.
Input signals and parameters are settable in the graphical window, however for demonstration purposes, the Modbus controller by default simulates a sine wave on the input signals which will override anything you input. Output signals are always controlled by the network.
Explore further
This article is a startup guide and only scratches the surface on U-Phy. How to access and enable other Ethernet protocols and adapt U-Phy for your specific device data, please register a free account and login – then head over to the U-Phy documentation.